Hi, thank you for purchasing our theme you may need to read this guide before beginning using our Shopify notification email template on shopify.
File Structure
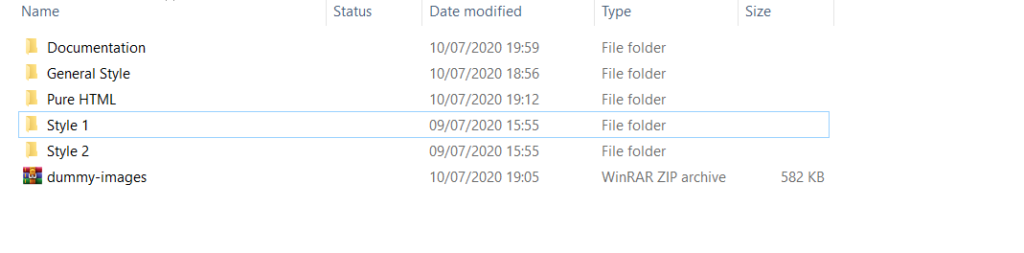
As you can see it has 5 folders and 1 zip file. The file that you are going to upload to Shopify is inside “Style 1”, “Style2”, “General Style” and “Dummy-images”.
The Pure HTML folder is non-shopify file you may need this file if you’re not using shopify and want to make the template to be compatible with other app.
Getting Started
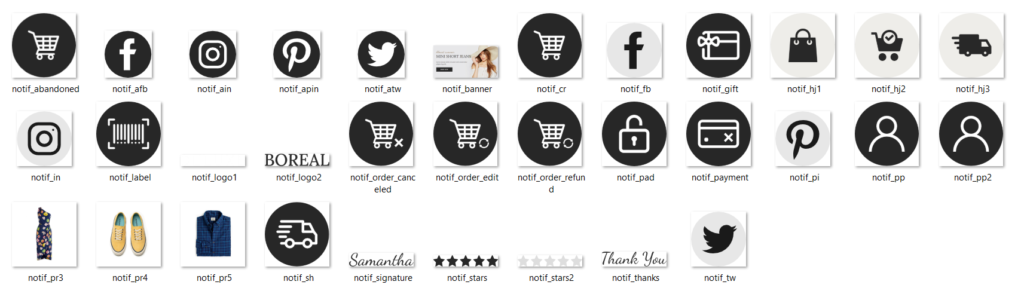
First you have to unzip dummy-images file and then open the folder. Now you have to replace few images with your own please look at the screenshot, there we have image called : “notif_pr3.jpg”, “notif_pr4.jpg”, “notif_pr5.jpg”, “notif_logo2.png”, “notif_banner” all you have to do is replacing those images with your own image. Please do not modify the image name or it may not showing up in your shopify store.
You can replace all of the images with your own image but make sure keep the image name and it’s file type.
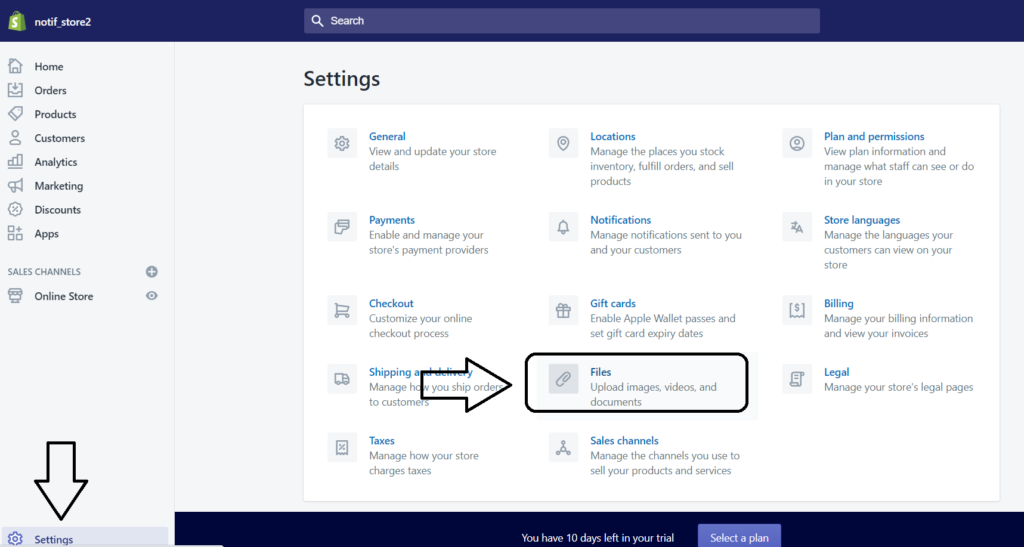
Once you’re done, now you can upload those image to your shopify store. Inside your shopify store click on settings > Files > Upload Files.
Importing Email Template to Shopify
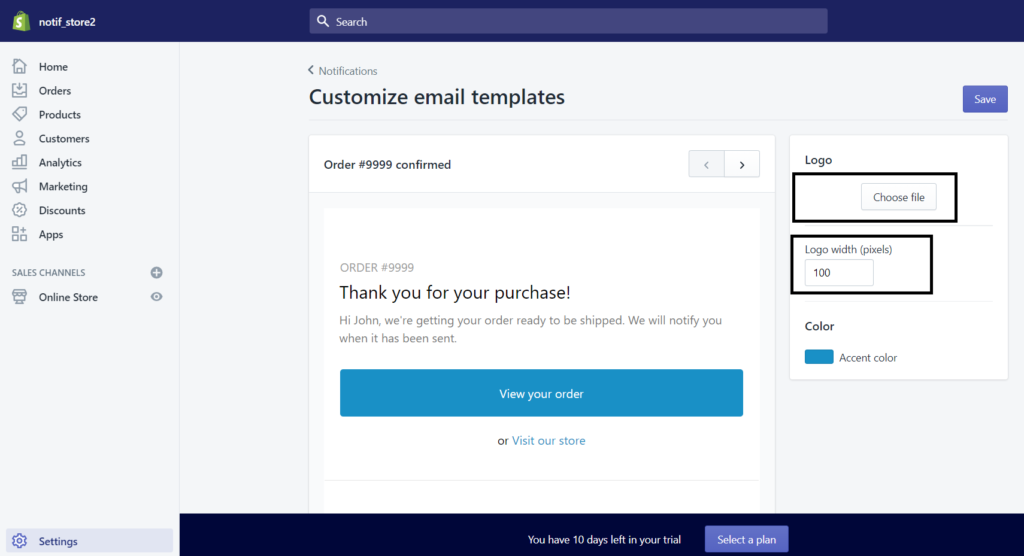
Inside shopify settings panel click on notification > Customize there put your store logo and and change it’s width, we recommend to set the width less than 200 pixels.
Skip this step if you already have image logo set up in your notification email, but you may still need to change it’s width. If you’re done just click on Save.
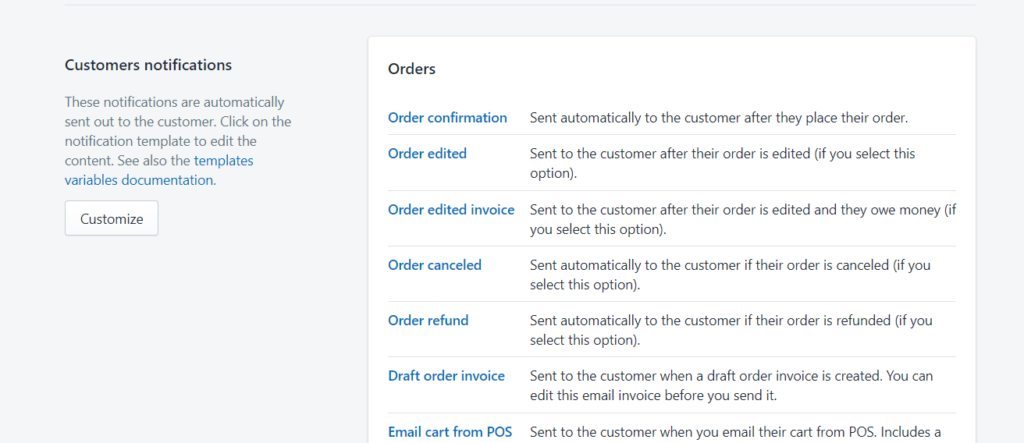
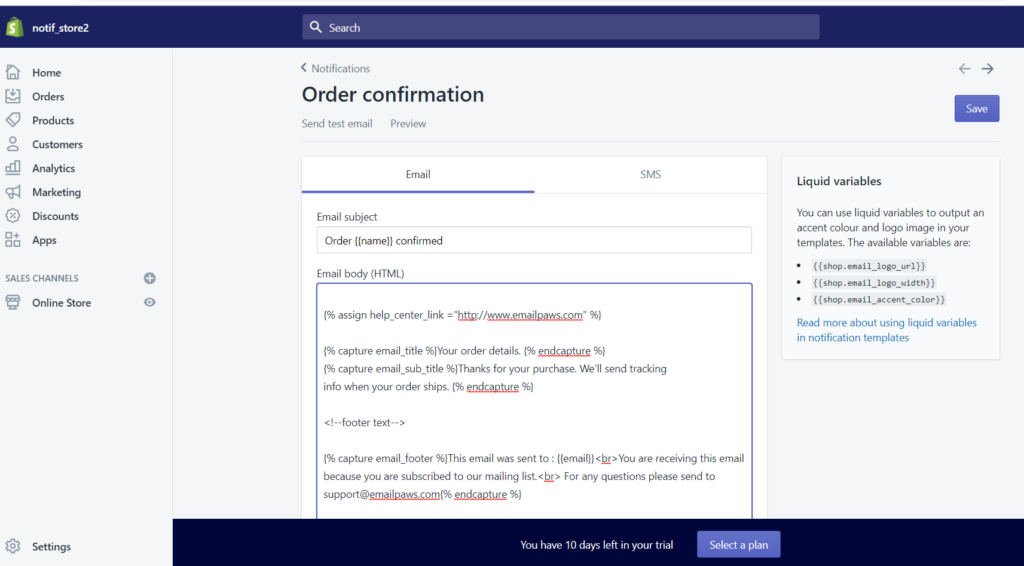
Now go back to Notification click on the notification you want to change. For example in this case we’re going to import order confirmation email. Click on Order confirmation then remove all of the code.
Now we will going back to file structure there we have few folders, in this case we will use style two, open the folder and find the order confirmation template file you can open it with text editor such as notepad, and then copy the whole code and paste it in order confirmation HTML forms.
Changing Font
In the new update we make changing font easier, it is now as easy as changing colors all you have to do is replacing the font link with yours you can use @import, @font-face or <link> see screenshot below.
Case 1 change font using <Link>
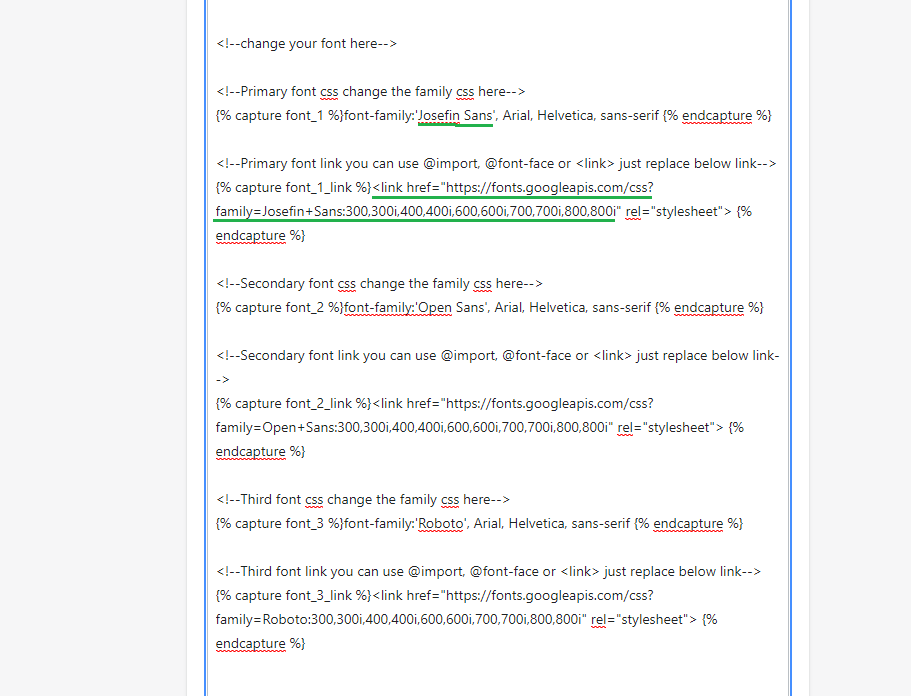
For example in this case (see green line) the font is Josefin Sans and it uses <link> as it’s font source. If you want to change it you can simply replace the link, in this case <link href=”https://fonts.googleapis.com/css?family=Josefin+Sans:300,300i,400,400i,600,600i,700,700i,800,800i” rel=”stylesheet”> replace it with your own link you can find free font at Google font. Also don’t forget to change the css font family in this case font-family:’Josefin Sans‘, Arial, Helvetica, sans-serif change the word Josefin Sans with your font name or simply replace the whole font family with your chosen font families.
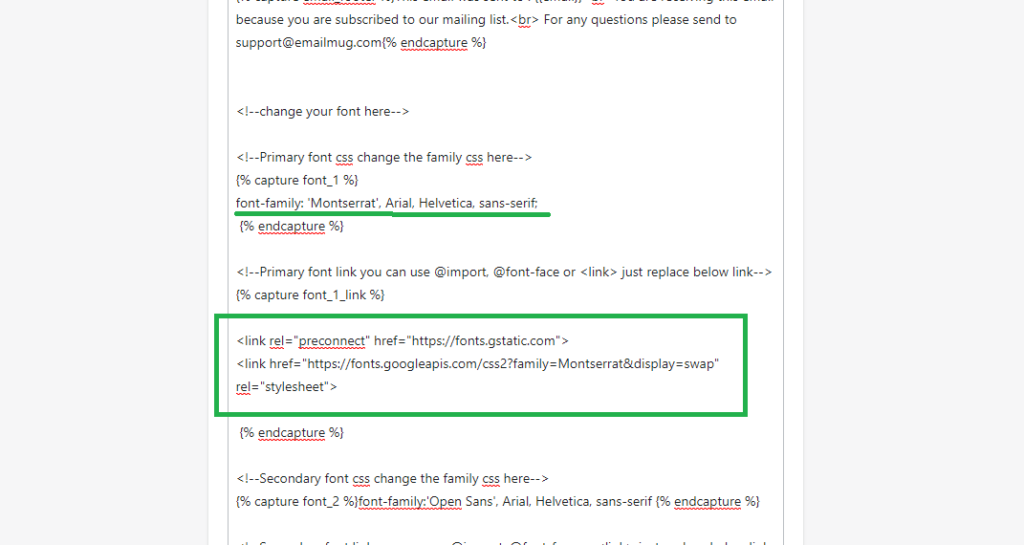
Okay for example I would like to change Josefin Sans font to Montserrat which I get from Google font and also uses <link> as my font source and Google font provide me with this link :
<link rel=”preconnect” href=”https://fonts.gstatic.com”>
<link href=”https://fonts.googleapis.com/css2?family=Montserrat&display=swap” rel=”stylesheet”>
Also Google font provide me this CSS rules :
font-family: ‘Montserrat’, sans-serif;
All you have to do is replacing Josefin Sans link and rules with you new font it would look like this after font changes from Josefin Sans into Montserrat.
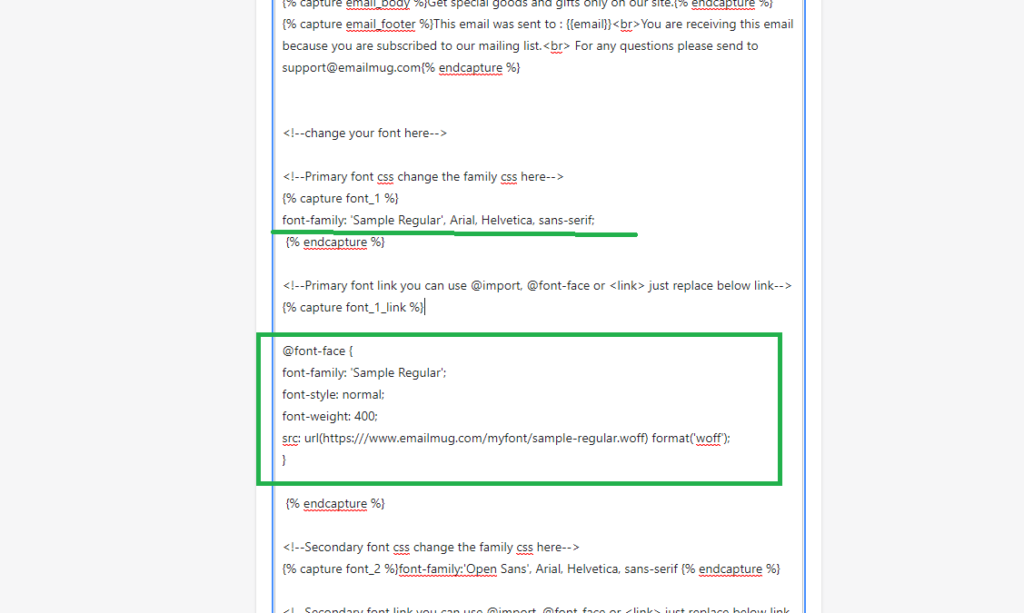
Case 2 change font using @font-face
If you have your font hosted on your website this guide could be helpful, so for example here we have our font hosted at this link : https:///www.emailmug.com/myfont/sample-regular.woff and we desired to change Josefin Sans to Sample Regular.
First we have to replace <link href=”https://fonts.googleapis.com/css?family=Josefin+Sans:300,300i,400,400i,600,600i,700,700i,800,800i” rel=”stylesheet”> replace it with :
@font-face {
font-family: ‘Sample Regular’;
font-style: normal;
font-weight: 400;
src: url(https:///www.emailmug.com/myfont/sample-regular.woff) format(‘woff’);
}
And then set the font family from Josefin Sans to Sample Regular it would look like this after font changes using @font-face
You can use the same way to change another font.
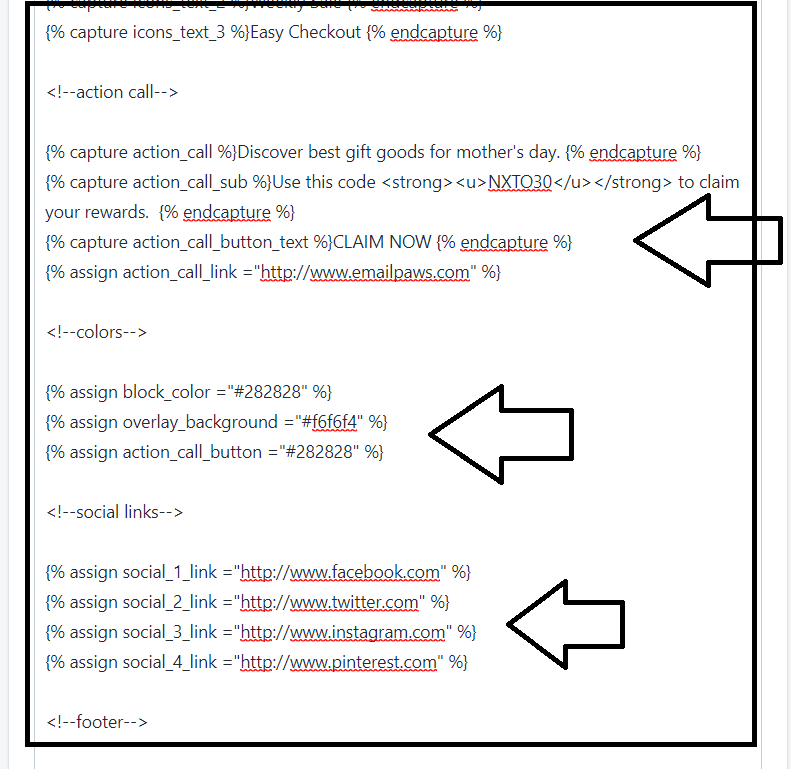
Customization
To customize the text, colors and links is pretty easy, inside HTML forms scroll down there’ll you find lots of code tags which easy to be replaced. See screenshot
When you’re done, click on preview to see the changes you have made and click save when you think it’s been what you expected. See this video tutorial if you prefer video guides.